Starting a Broiler farm
Starting a Broiler farm is profitable, but it’s not as easy as you think. From selecting your location to slaughtering your chickens, there are many factors you have to consider. You have to spend a lot of your time and care to make the business a profitable success. Here I have simplified the steps you should take to start a broiler farm. Please read my article on broiler farming before moving on to the steps to open a farm.
Step 1: Select the type of housing
As I have mentioned in my article about broiler farming, there are two types of broiler chicken housing. One is the deep-litter system and the battery cage system. Both have their own set of pros and cons. Let me give you a quick overview.
Deep litter systems are where broiler chickens are housed in an enclosure protecting from outside predators. But they are cage-less. They stay on the floor of the housing that is covered with litter like sawdust, wood shavings, hay, etc., to absorb the chicken feces and keep them dry and comfortable. They can be pretty crowded, but they still have space to spread their wings and move. They also can nest, have dust baths and escape to their perches above.
On the other hand, battery cage systems are essentially cages where birds are stuffed together and fattened. They have no room to move freely or express their natural instincts, but battery cage systems are beneficial for farmers in many ways. It is comparatively expensive to install but is convenient to inspect chickens and grow a large number of birds in a small space. But battery cages are banned in some countries due to their disregard for animal welfare. Please read my article on battery cages before you decide to go for it.

Step 2- Select your location and building.
Now that you have made up your mind on the type of housing think about your location for the farm. If you have selected deep litter, you will require much more space than for battery cage systems. But broilers don’t need as much space as pasture-raised chicken. The less space they are in, the more efficiently they convert food to fat and flesh.
You cannot overlook selecting the best location possible for your birds. If you plan a deep litter system, the area should not be wet or waterlogged. The roof has to be waterproof and non-leaky. It should be safe from predators like snakes and foxes and should be far from other animals as much as possible to minimize the risk of disease transmission.
Your building must be in the east-west direction to avoid direct sunlight but also be well-lit by natural sunlight. Some housing has artificial sunlight to mimic day and night, but that is not ideal. There should be ample shade and ventilation to avoid air pollution.
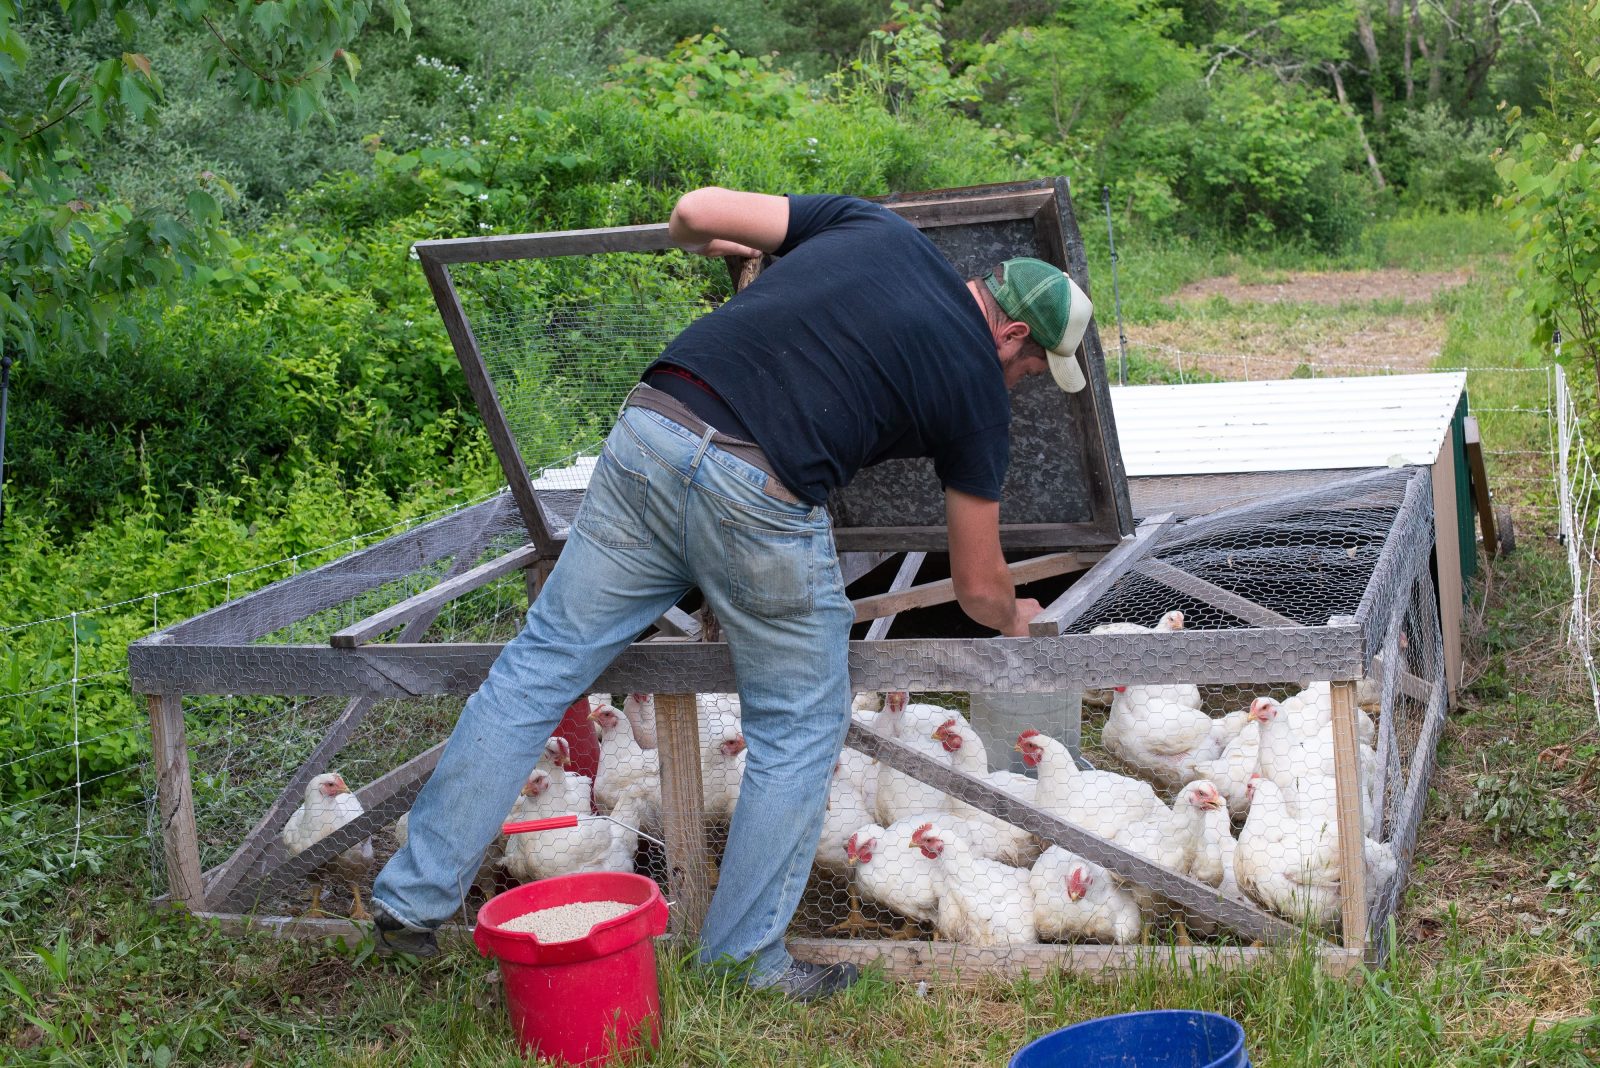
Step 3- Build the broiler pen.
Build your housing in such a way that it is strong, durable, and easy to repair when broken. Do not try to house them in makeshift barns because broilers are short-lived. Improper housing will cost you in the long run. Try not to make the wideness of the pen more than 10 meters because reduced width ensures good ventilation. The length of your pen would be determined by how many chickens you plan to house. And do not make the height less than 2 meters.
Depending on the climate of your location, a broiler pen must have adequate shade and ventilation or a warm and closed enclosure if it’s too cold. Broilers need an average temperature of 20 degrees to thrive. Build the roof to allow natural escape of heat.
Step 4-Selecting your chicks
A lot depends on the type of chicks you choose. Don’t start your farming journey with low-quality chicks. Chick quality depends on the quality of the parent chickens, the hatcheries, and the farming environment. There are many hatcheries with a wide range of chicks to choose from, but there is no quality for their quality. But if you could buy day-old-chicks from reputed hatcheries and avoid dodgy hatcheries.
Before choosing your chicks, ask for the source of parent stock, performance metrics, breed, and vaccination. Choose hatcheries that provide compensation for bad chicks. Always consider the track record and reputation of the hatcheries you choose. You can ask local farmers for advice.
Step 4-Brooding chicks
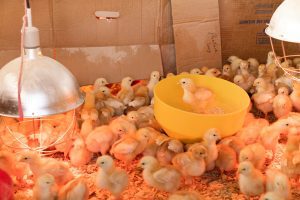
Now that you have your site and building all ready for the arrival of your chicks know that your work is going to get more intense. Brooding a chick is not an easy job. Chicks are very sensitive, delicate creatures that must be handled with a lot of care and precision. They must be provided with adequate heat because they can’t regulate their own body temperatures and must be given necessary medication and feed.
This care and heat might have been provided by the mother chickens, but since the chicks were separated and hatched separately, we must give them artificial heat like the mother hen. Your artificial source of heat could be charcoal stoves, kerosene stoves, gas brooders, electric brooders, or incandescent light bulbs. Choose one that is the most cost-effective and safe to use without risk of fire hazards.
Chicks must be kept within a small enclosed space within your broiler pen. If you keep them in large spaces, they are at risk of getting lost or getting cold. They are still unable to look for food and water themselves, so must be kept close to their source of provisions. Please read this article on how fast chicks grow for more information.
Please read this article for the best temperatures for newborn chicks.
There are many things to take care of before the arrival of the chicks. Before receiving the chicks, the pen must be disinfected thoroughly, including the water outlet, feeding utensils, and other equipment. Prepare a system like a cloakroom where anyone going in and outside the brooding area can disinfect their hands and footwear. Ensure the space of closed enough to trap heat and does not have droughts. Secure the pen well before the chicks arrive.
24 hours before the chicks come, you must spread wood shavings or plywood up to 5cm above the floor. Heat the pen and use thermometers to maintain a temperature of 34 degrees. Illuminate the pen with bulbs. Arrange the water drinkers and feeders so the chicks can reach them easily.
Mix mild broad-spectrum antibiotics, multivitamins, and glucose and place in a water feeder for them. Put broiler starter mash and crumble feeds out for them. After the chicks arrive, transfer them to the pen immediately and take account of dead and injured ones. Make sure they have enough food, space and water. Keep checking on them often, the first few days.
If the chicks are evenly distributed, then the temperature is just right. If they huddle together, it means it’s too low. And if they move away from the heat source, it means it’s too high.
Give them food and water around the clock, and include vitamins and anti-biotics to their diet. Replace and clean litter. Remove dead chicks immediately. Reduce the temperature gradually as they grow.
Very importantly, keep a record of the food you administer, the number of living chicks and dead ones. Weigh and monitor each chick every day. Chicks have to be mothered well, or they can die easily.
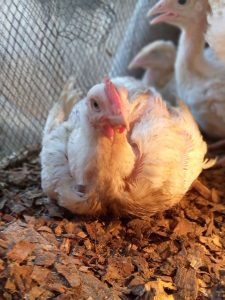
Step 5- Raising your chickens
Now that you have gotten through the tedious task of brooding the chicks, your chickens are now old enough to maintain their own temperature. You can transfer them to their pens or battery cages. Be sure to feed them high-quality feed. Low-quality feed can save you money, but it will cost you the health of your chickens and a low production outcome overall. Broiler feed are of three categories; broiler starter diet, broiler grower diet, and broiler finisher diet.
Most consider broilers perfect for slaughtering at 6 weeks. Because after this they tend to decline in weight gain.
Water is very important for broilers. Make sure they have adequate water at all times. It also increases during hot weather.
Make sure your chickens are healthy. Give them the necessary medications and vaccinations if needed. Keep them clean and prevent the spread of diseases as much as possible.
Step 6- Slaughter and Freeze
You have to decide on the best time to slaughter your chickens, usually between 6-8weeks. If you wait for too long, the weight gain of the chicken reduces, and you might end up spending more on its food.
Decide on the manner of slaughtering. Industrial slaughter machines are expensive to install but easy and efficient. If you don’t have many chickens, you can do the slaughtering and de-feathering by hand. Arrange a good way to dispose of the waste. If your broilers are not being transported to the market immediately, they have to be packaged and frozen until they are.
Though I have mentioned this, at last, this is not the final aspect to think about. Your type of consumers and market must be well-established even before you begin broiler farming. You could sell your broilers to the local grocery store, restaurant, or supermarket. Consider the number of your chickens, the demand, and how fast you want your chickens sold. It is usually preferable to sell your chickens fresh and not frozen and slaughter only as per the amount needed.
Summary
There are many factors to consider when starting a broiler farm and you must be prepared to devote a lot of your time and energy to make it a success. Your profit depends on many decisions you take on the way and the adequate care given to your chickens.
